Last updated: June 27, 2022
A dependent is an immediate family member who is covered under your group
insurance plan. You can only claim a family member’s healthcare expenses if
you choose family, couple or single-parent coverage and list them as a
dependent.
You may be able to make these changes on our secure website, depending on
your plan. However, changes can only be made when one of the following life
events occurs:
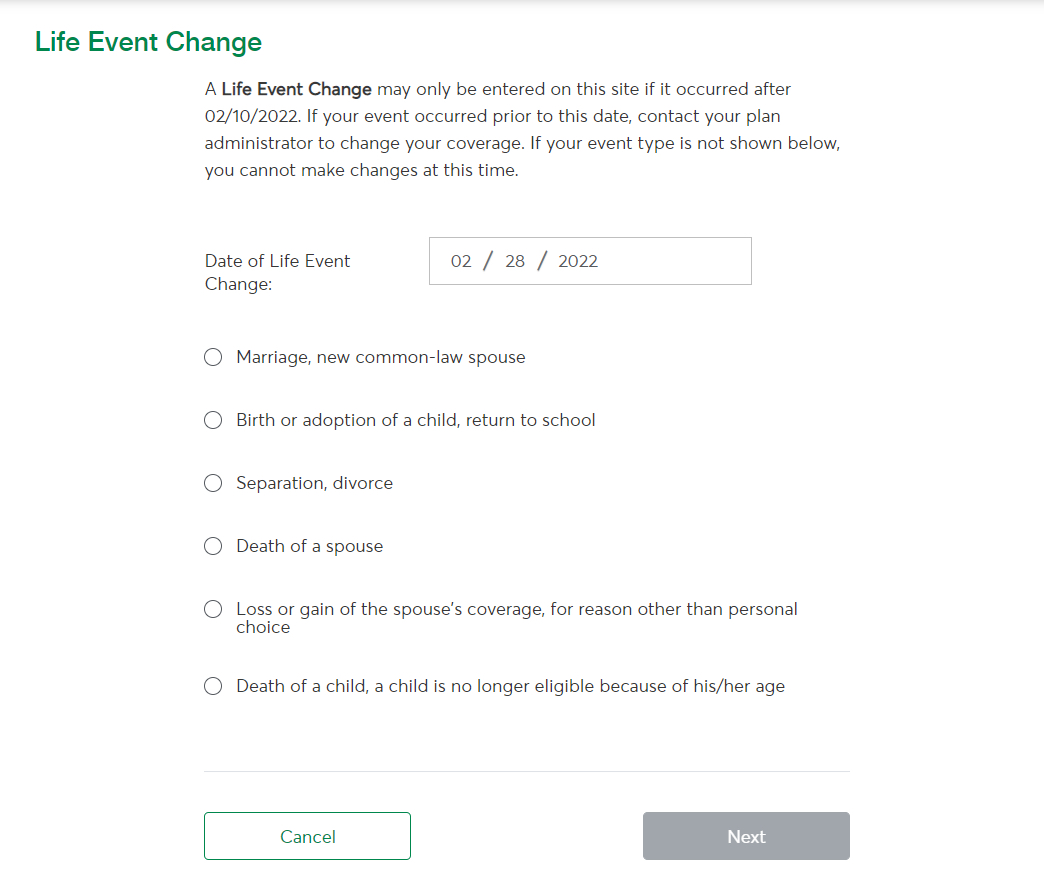
- Marriage or new common-law spouse
- Separation or divorce
- Birth, adoption of a child or return to school
-
Loss or gain of a spouse's coverage, for a reason other than
personal choice
- Death of a dependent
- Termination of a dependent's eligibility because of their age
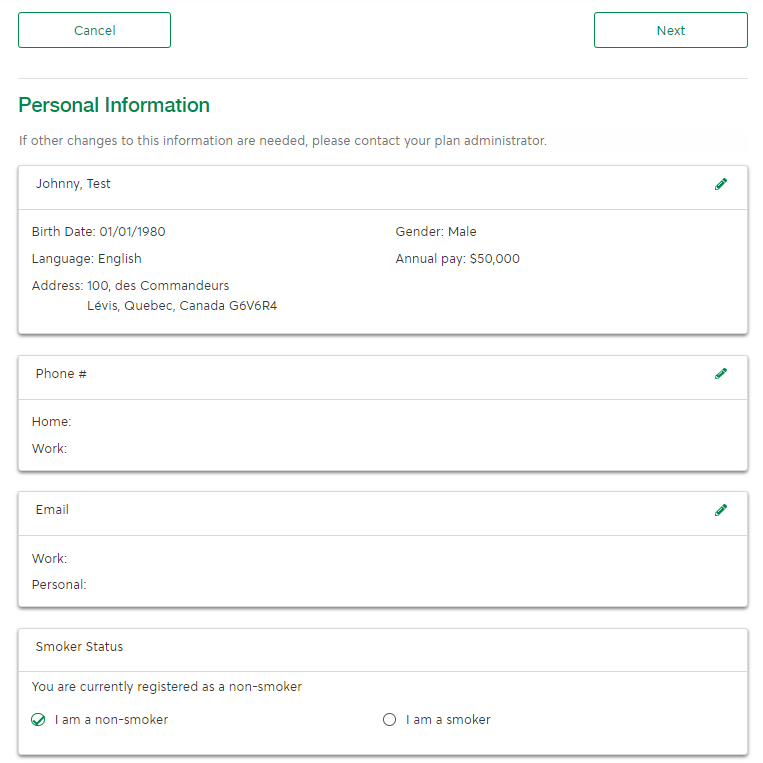
Before you start
-
You might see different options and fields than what’s shown
here, depending on your plan. If there’s any information you
can’t see or make changes to, contact the person responsible for
your plan.
-
You have 31 days to inform us of a life
event. After the 31-day period, you will have to inform the
person responsible for your plan.
-
Any changes you make to your dependents’ information will take
effect right away, unless you specify a future date.
-
If you notice an error after confirming your changes, you will
have to ask the person responsible for your plan to make the
correction for you.
Steps
-
Log in to your account.
Need help logging in?
- Click Your account.
-
Depending on your plan, you will see one of the following two options:
Enrollment and coverage or
Dependents and coordination of benefits. Click
whichever of these options appears on your screen.
Don’t see either option?
That probably means your plan doesn’t allow you to make changes to
your dependent list online. You will have to ask the person
responsible for your plan to do it for you.
-
-
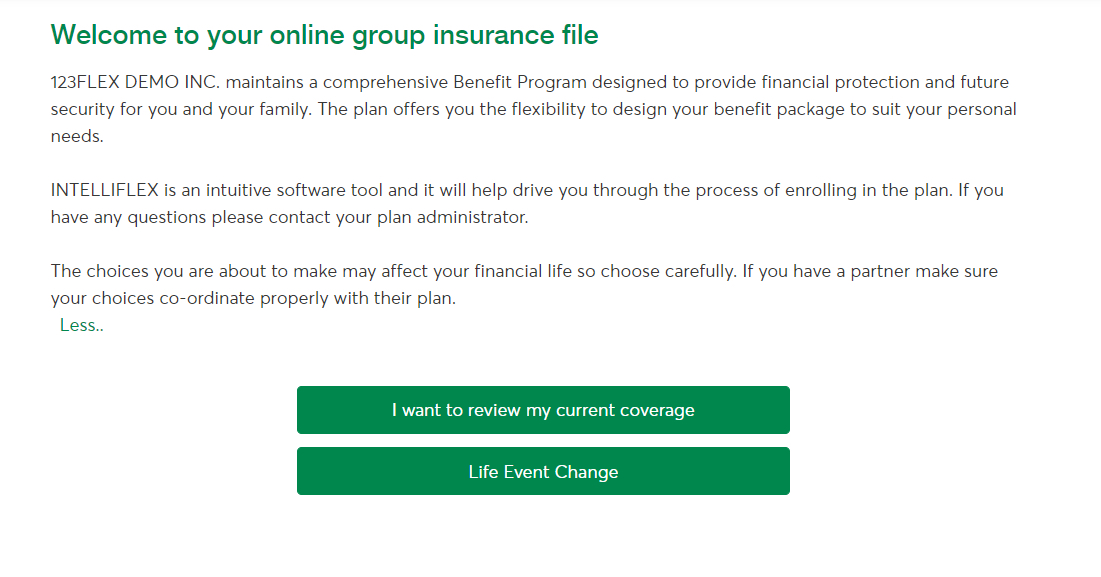
Add a dependent
To edit your list of dependents, click
Life Event Change.
Select the life event type and enter the date on
which it occurred, then click Next.
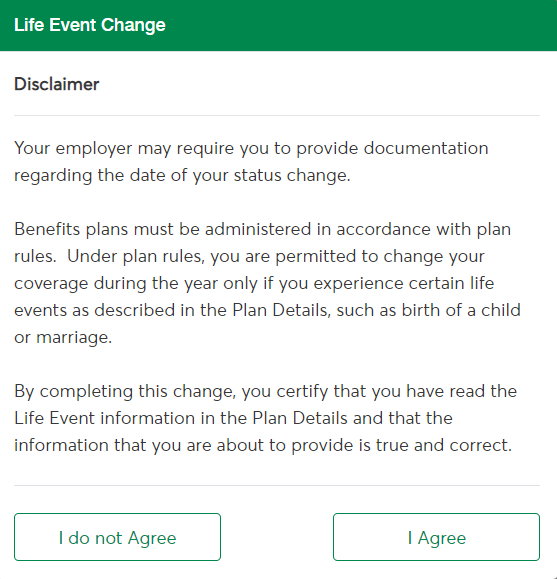
A window will appear indicating that you may be
required to provide supporting documents to prove
the date of the life event. Click
I Agree to continue.

Click Next to proceed and change
your list of dependents.
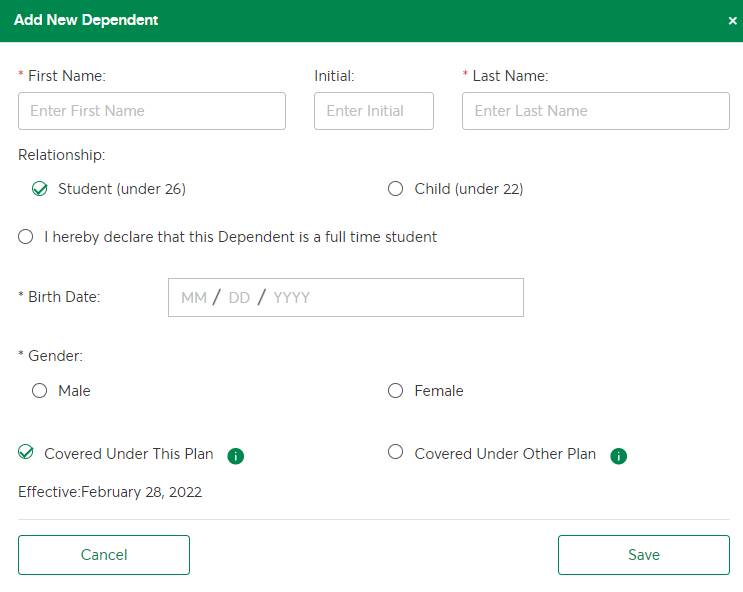
Click Add New Dependent.
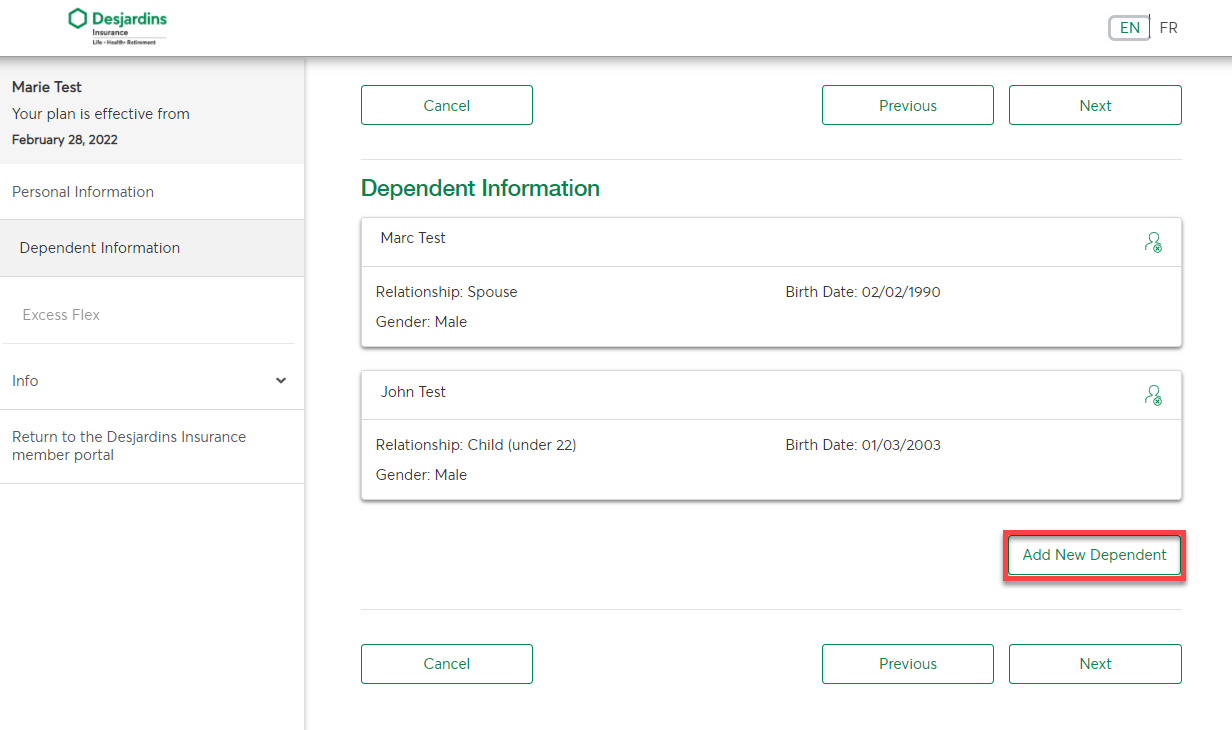
Enter the dependent’s information, then click
Save. Your dependent has now been
added to your account.
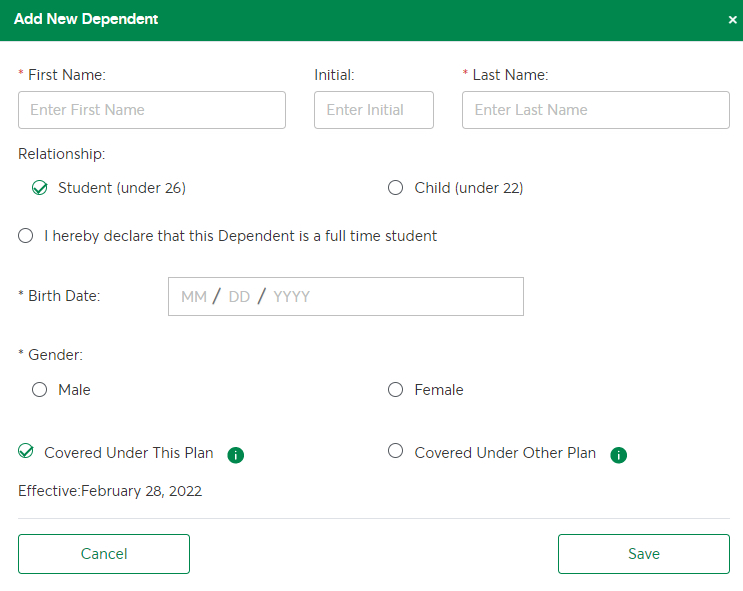
Once a child turns either 18 or 21
(depending on what it says in your plan
booklet), he or she must be a full-time
student in order to be insured under
your policy.
Select the child’s age category. If your
child is 18–25 or 21–25 (depending on
what it says in your plan booklet) and
is studying full-time, check
I hereby declare that this
Dependent is a full-time
student.
For dependents aged 25 or under,
you must
confirm their student status
at the beginning of each university
session.
If your child has similar healthcare
coverage under another group insurance
plan, you must let us know by checking
the
Covered Under Other Plan box. That way you’ll be able to
submit online claims to each plan to get
the maximum reimbursement you’re
entitled to.
Learn more about the
coordination of benefits.
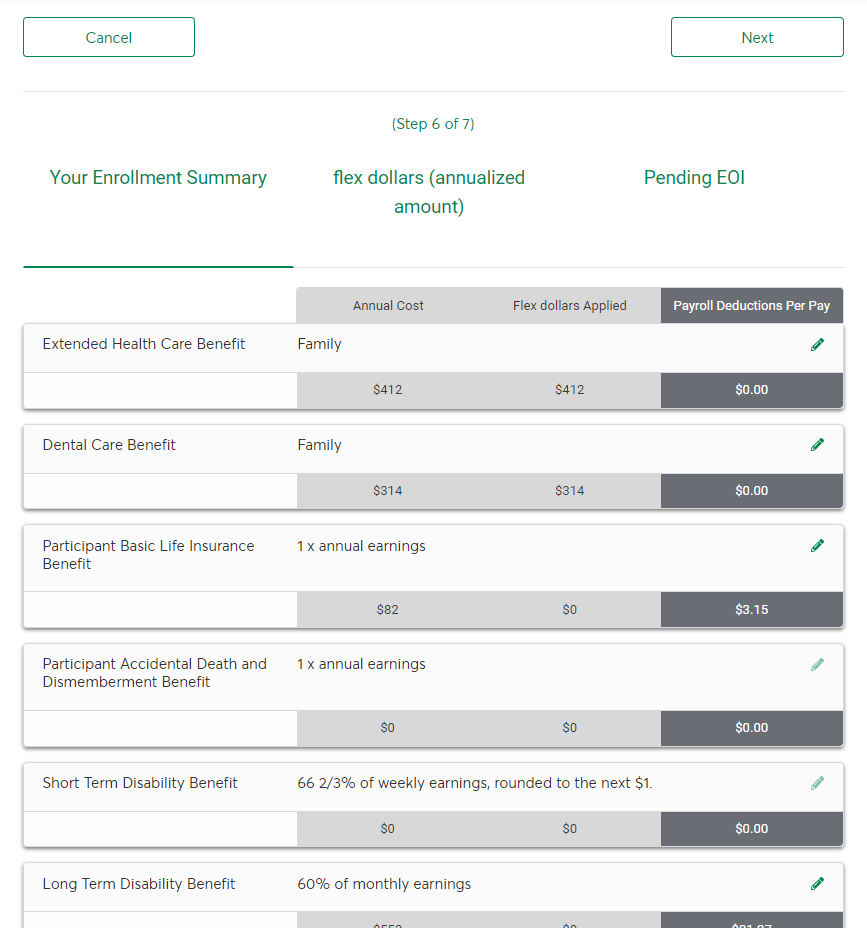
Follow the on-screen instructions and make changes
as needed. Review the changes on the
Enrollment Summary page, click
Back and then
Submit.

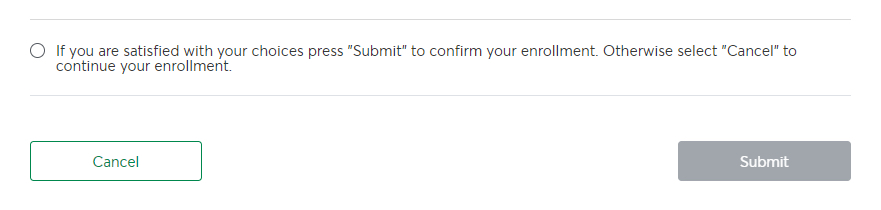
Click Submit to finalize the
changes to your account.

Your changes have been saved. You can print and save
a copy of your Confirmation Statement by clicking
View/Print.
Edit dependent information
To edit your list of dependents, click
Life Event Change.

Enter the life event type and the date on which it
occurred, then click Next.

A window will appear indicating that you may be
required to provide supporting documents to prove
the date of the life event. Click
I Agree to continue.
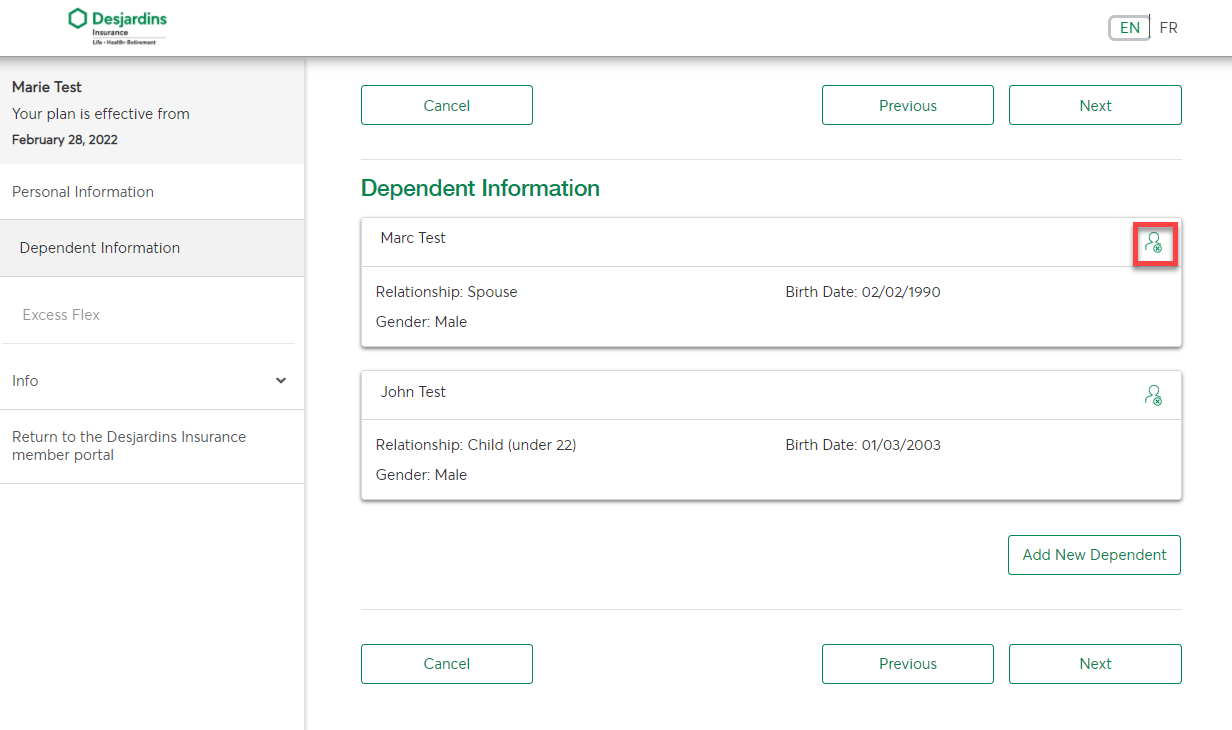
To edit an existing dependent’s
information, you must remove them from your list by
clicking the profile icon on the right and then add
them again.
Enter the dependent’s information, then click
Save. Your dependent has now been
added to your account.
Once a child turns either 18 or 21
(depending on what it says in your plan
booklet), he or she must be a full-time
student in order to be insured under
your policy.
Select the child’s age category. If your
child is 18–25 or 21–25 (depending on
what it says in your plan booklet) and
is studying full-time, check
I hereby declare that this
Dependent is a full-time
student.
For dependents aged 25 or under, you
must contact us to
confirm their student status
at the
beginning of each academic
session.
If your child has similar healthcare
coverage under another group insurance
plan, you must let us know by checking
the
Covered Under Other Plan box. That way you’ll be able to
submit online claims to each plan to get
the maximum reimbursement you’re
entitled to.
Learn more about the
coordination of benefits.
Click Next and follow the
instructions to make changes to your account. Review
the changes on the
Enrollment Summary page before
clicking Submit.
Click Submit to finalize the
changes to your account.
Your changes have been saved. You can print and save
a copy of your insurance certification by clicking
View/Print.
Terminate coverage for a dependent
To edit your list of dependents, click
Life Event Change.

Select the life event type and enter the date on
which it occurred, then click Next.

A window will appear indicating that you may be
required to provide supporting documents to prove
the date of the life event. Click
I Agree to continue.

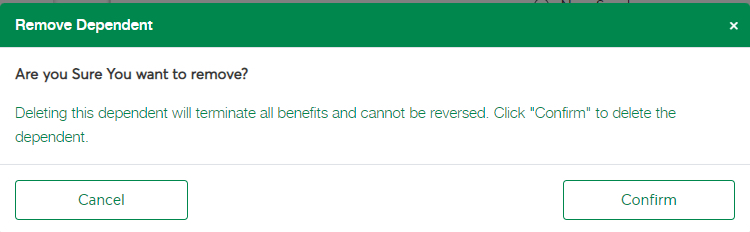
To remove a dependent from your
account, click the profile icon that appears next to
their information.

Click Confirm to validate that you
want to remove this person from your list of
dependents.
Click Next and follow the
instructions to make changes to your account. You
can review the changes on the
Enrollment Summary page before
clicking Next.

Click Submit to finalize the
changes to your account.

Your changes have been saved. You can print and save
a copy of your Confirmation Statement by clicking
View/Print.
Add a dependent
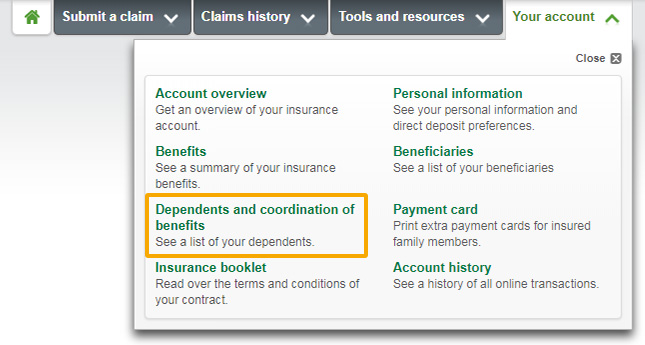
From the home page, select
Your account > Dependents and coordination
of benefits.

Don’t see this option?
That probably means your plan doesn’t give
you online access to your dependent list.
Contact the person responsible for your
group insurance plan for more information.
If you have a flexible insurance plan
(IntelliFlex)
The steps shown here do not apply to you.
You can manage your dependent information
from the
Enrollment and coverage
section.
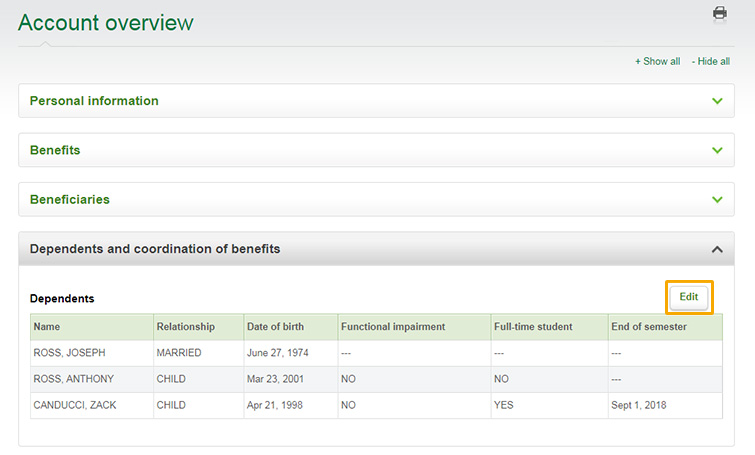
Under
Dependents and coordination of benefits, click on Edit.
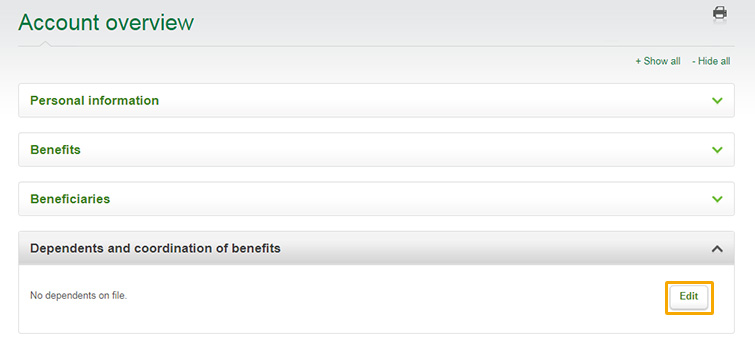
Don’t see this button?
That probably means your plan doesn’t let
you update your dependent information
online. Contact the person responsible for
your group insurance plan for more
information.
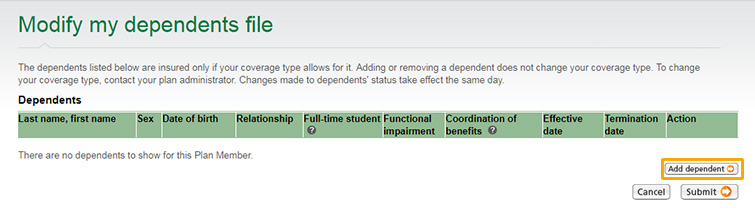
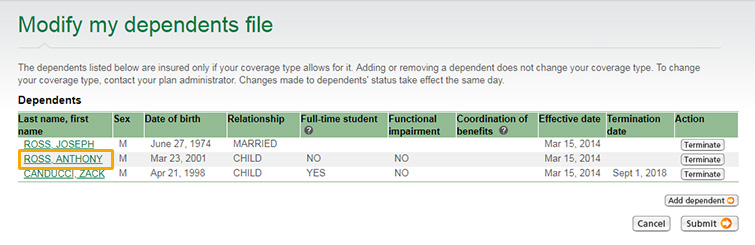
IMPORTANT : Updating your
list of dependents won’t change your coverage
type (individual, family, etc.).
From the
Modify my dependents file page,
Click on Add dependent.
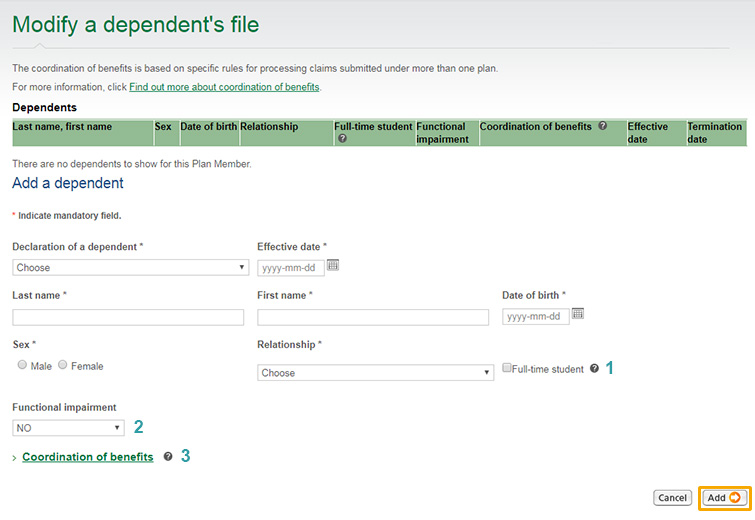
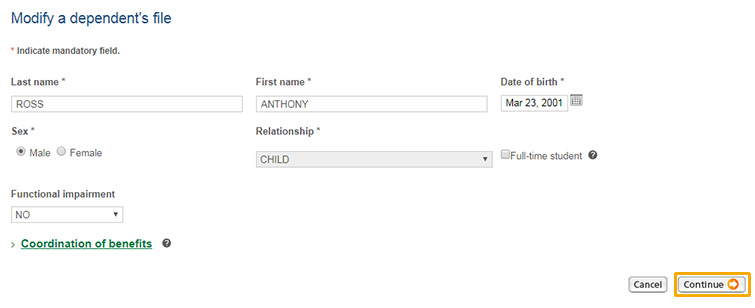
Fill out the required fields and click on
Add.
Full-time student
If your child is 18–25 or 21–25
(depending on the age limit indicated in
your plan booklet) and studying
full-time, check the
Full-time student box
(see 1 in the screenshot)
and provide the necessary information to
confirm their student status.
Functional impairment
If your child is 18+ or 21+ (depending
on the age limit indicated in your plan
booklet) and has a physical or mental
disability, select
YES from the drop-down
list under
Functional impairment(2) and
provide the necessary information.
Coordination of benefits
If your dependent has similar healthcare
coverage under another Desjardins group
plan, fill out the
Coordination of benefits
section
(3). You
can then use your secure site to submit
claims to each Desjardins plan to get
the maximum reimbursement you’re
entitled to. This will only work if both
plans are with Desjardins; otherwise,
you’ll have to submit separate claims to
each insurer to coordinate benefits.
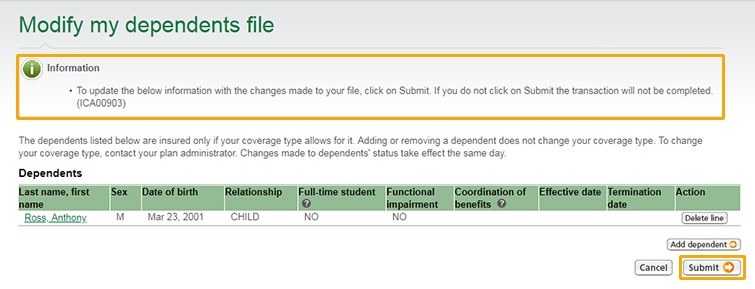
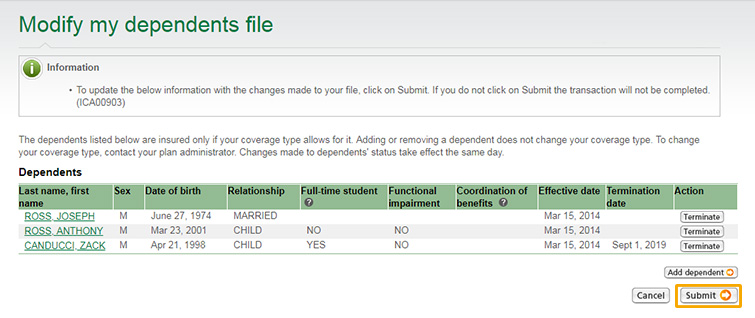
The next screen will provide you with some
instructions. If supporting documentation is
required to process your request, this is where
we’ll ask you for it.
Read these instructions carefully
and click on Submit to complete the
process.
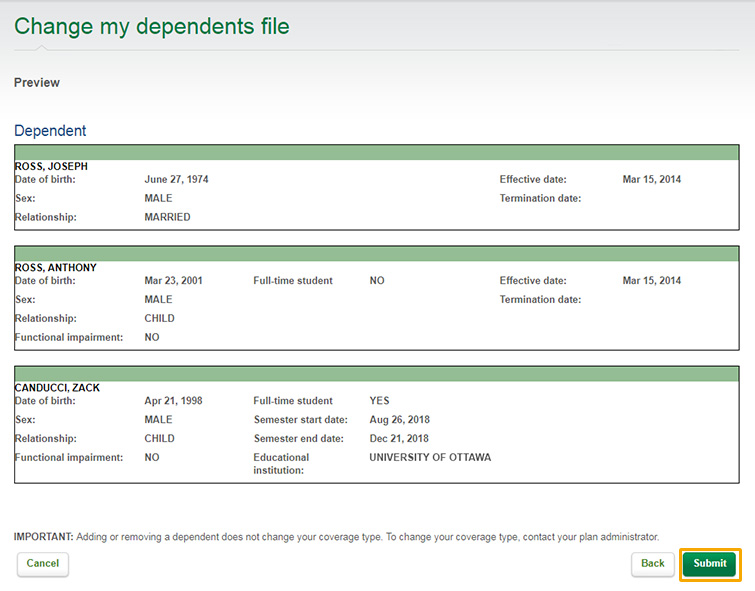
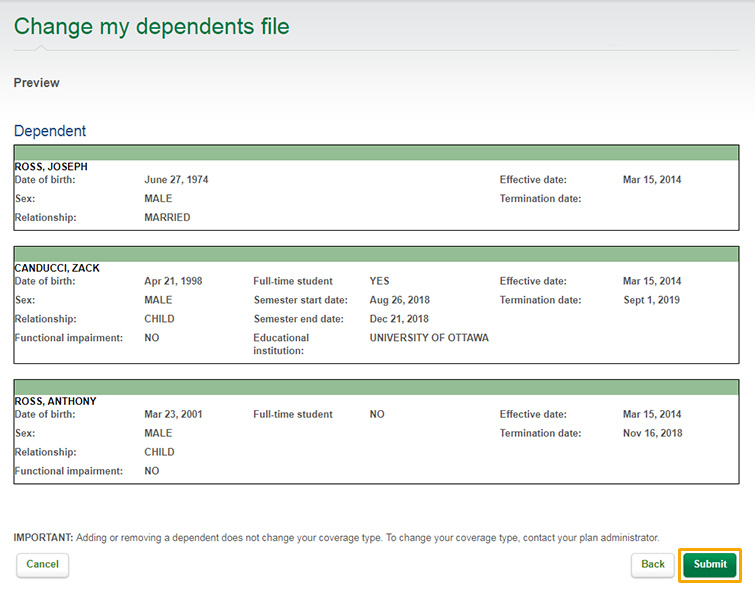
You’ll see a summary of your dependent information
on the next screen. Make sure everything is correct,
then click on Submit to confirm
your changes.
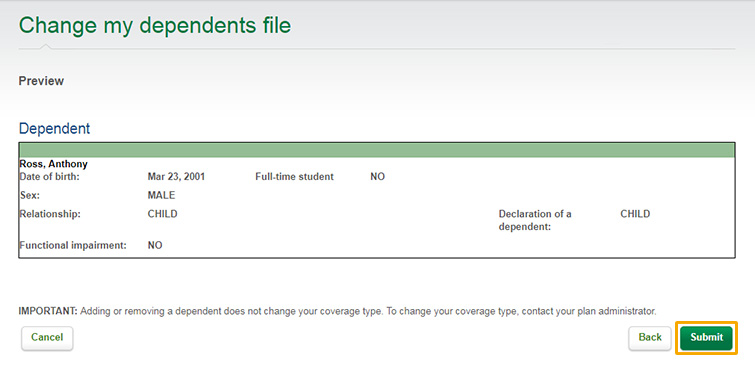
A confirmation message will appear onscreen. You can
print the page if you like, or click on
Back to home page.
Change coverage type
Updating your list of dependents won’t change
your coverage type (individual, family, etc.).
To change coverage type, you have to contact the
person responsible for your group insurance
plan.
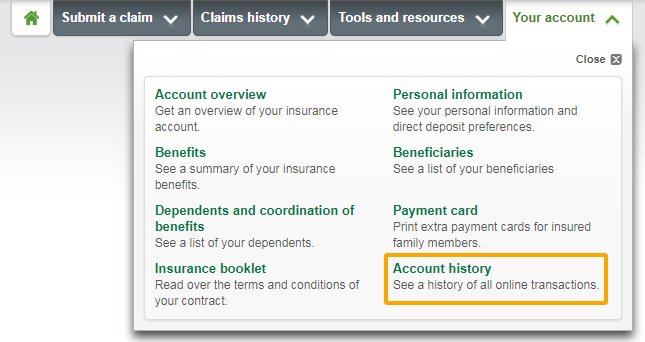
Account history
If you ever need to check a transaction you
made online, you can find your entire
history by going to
Your account > Account
history.
Edit dependent information
Log into the plan member site.
Need help logging in?
From the home page, select
Your account > Dependents and coordination
of benefits.
Don’t see this option?
That probably means your plan doesn’t give
you online access to your dependent list.
Contact the person responsible for your
group insurance plan for more information.
If you have a flexible insurance plan
(IntelliFlex)
The steps shown here do not apply to you.
You can manage your dependent information
from the
Enrollment and coverage
section.
Under
Dependents and coordination of benefits, click on Edit.

Don’t see this button?
That probably means your plan doesn’t let
you update your dependent information
online. Contact the person responsible for
your group insurance plan for more
information.
IMPORTANT : Updating your
list of dependents won’t change your coverage
type (individual, family, etc.).
Click on the name of the dependent whose information
you want to edit.
Make the changes you want and click on
Continue.
Full-time student
If your child is 18–25 or 21–25
(depending on the age limit indicated in
your plan booklet) and studying
full-time, check the
Full-time student box
(see 1 in the screenshot)
and provide the necessary information.
If you need assistance, read the
information on how to confirm a
dependent’s student status.
Functional impairment
If your child is 18+ or 21+ (depending
on the age limit indicated in your plan
booklet) and has a physical or mental
disability, select
YES from the drop-down
list under
Functional impairment(2) and
provide the necessary information.
Click on Submit to confirm your
changes.
You’ll see a summary of your dependent information
on the next screen. Make sure everything is correct,
then click on Submit to confirm
your changes.
A confirmation message will appear onscreen. You can
print the page if you like, or click on
Back to home page.
Account history
If you ever need to check a transaction you
made online, you can find your entire
history by going to
Your account > Account
history.

Terminate coverage for a dependent
Log into the plan member site.
Need help logging in?
From the home page, select
Your account > Dependents and coordination
of benefits.

Don’t see this option?
That probably means your plan doesn’t give
you online access to your dependent list.
Contact the person responsible for your
group insurance plan for more information.
If you have a flexible insurance plan
(IntelliFlex)
The steps shown here do not apply to you.
You can manage your dependent information
from the
Enrollment and coverage
section.
Under
Dependents and coordination of benefits, click on Edit.
Don’t see this button?
That probably means your plan doesn’t let
you update your dependent information
online. Contact the person responsible for
your group insurance plan for more
information.
IMPORTANT : Updating your
list of dependents won’t change your coverage
type (individual, family, etc.).
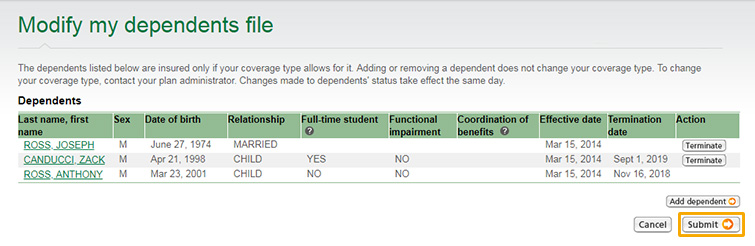
Find the name of the dependent whose coverage you
want to terminate, and click on
Terminate at the end of the row.
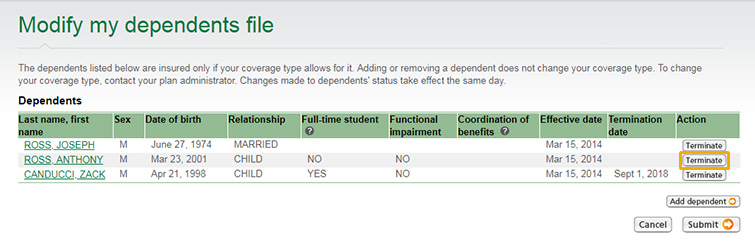
Don’t see this button?
That probably means your plan doesn’t let
you make this kind of change online. Contact
the person responsible for your group
insurance plan for more information.
Enter the coverage termination date and click on
Terminate. Note that you can’t
select a date more than 90 days in the future.

Click on Submit to confirm your
change.
You’ll see a summary of your dependent information
on the next screen. Make sure everything is correct,
then click on Submit to confirm
your changes.
Note
Your dependent’s name will continue to show
up in your list after you terminate their
coverage. However, starting on the coverage
termination date you specified, claims
submitted for that person will not be
approved
A confirmation message will appear onscreen. You can
print the page if you like, or click on
Back to home page.
To change coverage type
Updating your list of dependents won’t change
your coverage type (individual, family, etc.).
To change coverage type, you have to contact the
person responsible for your group insurance
plan.
Account history
If you ever need to check a transaction you
made online, you can find your entire
history by going to
Your account > Account
history.